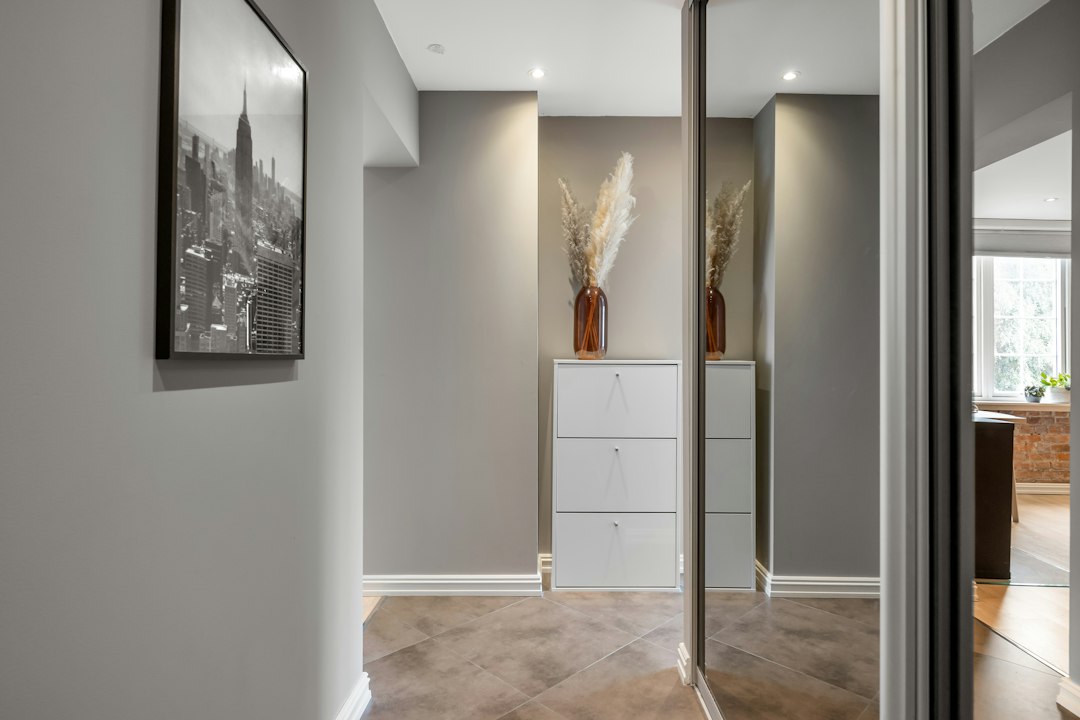
If you are hunting for practical, stylish dressing room ideas, you are in the right place. Whether you have a spare bedroom, a nook off the primary suite, or only a sliver of space behind a sliding door, you can build a dressing zone that supports how you live day to day. This guide covers the details that matter in real homes: how to plan a layout, choose storage systems, specify flattering and functional lighting, select durable finishes, manage airflow for clothes care, and keep the space easy to use over time. You will find checklists, comparisons, and maintenance routines designed for apartments, townhomes, and houses—no showroom-only advice, just solid guidance you can apply in your space.
dressing room ideas: start with your space and goals
Every successful dressing area begins with two anchors: what you need the space to do and how much room you truly have. Before buying a single shelf, map the available footprint, ceiling height, and door swing zones. Take measurements three times, record them, and sketch a quick to-scale drawing. Mark any fixed items (windows, radiators, outlets, existing doors) because they shape where wardrobes and mirrors can go. Note how you move through the space: if two people will share it, do you need parallel circulation paths or can you adopt a one-way flow that reduces bumping?
Next, sort your clothing and accessories by frequency of use. A simple method is the Four Boxes: daily wear, weekly wear, occasional wear, and keepsakes. Assign initial lengths to hanging rods based on these groups, and estimate drawer counts for folded items. Identify special categories—long dresses, heavy coats, handbags, hats, scarves, belts, ties, jewelry—and decide if they live behind doors, in drawers, on pull-out racks, or on open shelves. Put a sticky note on each category with its ideal home. This prework avoids buying storage that looks neat but does not match what you own.
Finally, define comfort goals. Do you need a bench for shoes, a seat-height ottoman for dressing, or a vanity for quick grooming? Are you seeking privacy from bedroom light or noise in the morning? Would acoustic panels or a soft rug help? Do you prefer a bright, crisp feeling or a warm, cocooned vibe? These preferences will guide the lighting and material choices later on.
Choosing the right wardrobe systems
Wardrobe systems fall into four broad families, each with trade-offs in cost, flexibility, and durability. Knowing these differences helps you build the right core structure before you add accessories.
- Modular carcass systems: Box-based components that stack or line up. They are affordable, widely available, and easy to reconfigure. Doors, drawers, and shelves attach to standard widths. Downside: seams and joints are visible, and heavy loads can cause sagging without proper reinforcement.
- Built-in millwork: Custom cabinetry sized to your wall, often floor-to-ceiling, with scribed ends for a seamless look. It maximizes space and can hide irregularities. Pros: longevity, exact fit, beautiful finishes. Cons: higher cost, requires skilled installation, less flexible after installation.
- Open rail systems: Minimal brackets, uprights, and rods with no doors. Pros: light visual weight, quick access, lower cost. Cons: dust exposure, visual clutter if color coordination is not planned, and more frequent tidying.
- Freestanding wardrobes: Standalone units you can move. Great for renters or rooms where walls can’t bear heavy loads. Check depth and door swing clearance carefully; in tight rooms, sliding-door units may be better than hinged doors.
Whichever route you take, prioritize foundational strength. For heavy hanging, select 25 mm (1 in) shelves or reinforced rails. For drawers, look for metal sides or solid wood boxes with quality runners (full-extension and soft-close reduce wear and noise). For doors, verify hinge count and weight capacity; tall doors typically need three hinges minimum.
Tip: mix systems. Use built-in millwork for the main wall, add a modular tower for accessory storage, and a freestanding unit in a tricky corner. Hybrid approaches often deliver the best value.
Layouts that work in real homes
Layout is where a dressing room succeeds or fails. Focus on clear circulation and easy reach, not just symmetry. Here are common patterns and when they shine:
- Galley (two parallel walls): Ideal for narrow rooms. Place hanging zones at shoulder height on both sides, shelves above, and drawers below. Leave a 900 mm (36 in) walkway if possible; less than 800 mm feels tight for two people.
- U-shape: Three connected walls of storage. Great for square rooms and high capacity. Keep the end wall shallower or use open shelves to avoid a boxed-in feel.
- L-shape: Perfect for corner niches. Put long-hang on the tall wall and short-hang plus drawers on the adjacent wall. A corner carousel or angled shelves can prevent dead zones.
- Peninsula: A storage spine projects into the room. Useful when one wall has a window or door you want to keep clear. Ensure a minimum 900 mm clearance around the peninsula.
- Room-within-a-room: Screens or partial partitions carve out a dressing area inside a larger bedroom. Add a transom or open gap at the top for airflow; full-height partitions can trap heat and odors.
Regardless of shape, create “hot” and “calm” zones. Hot zones hold daily-use items near eye level. Calm zones hold keepsakes and seasonal pieces higher or lower. Always position mirrors where natural or artificial light is flattering, not behind dark storage that casts shadows.
Smart storage: drawers, shelves, pull-outs, and specialty fittings
Storage works best when it is matched to the item and the motion needed to access it. Here is a field-tested breakdown by category and fitting:
- Folded clothing (tees, sweaters, denim): 200–250 mm drawer heights keep stacks tidy. Use full-extension runners so back items are reachable. Consider adjustable dividers for sweaters to avoid leaning towers.
- Hanging clothing: Short-hang rods at 1000–1100 mm height fit shirts and skirts; long-hang rods at 1500–1700 mm fit dresses and coats. Double-hang plus a slim shelf above maximizes vertical space.
- Shoes: Pull-out trays or angled shelves with a shallow rail are efficient. Allow 280–300 mm depth for most shoes; boots need 450 mm. A boot hook or spring tension rod can keep tall shafts upright.
- Accessories: Velvet-lined jewelry trays reduce scratches. Narrow pull-outs (150–200 mm wide) with hooks or pegs manage belts and ties. A ventilated drawer for scarves prevents musty odors.
- Handbags: Adjustable shelves with gentle dividers maintain shape. For heavy totes, add a low cubby to avoid lifting above shoulder height.
- Laundry workflow: Integrate a tilt-out hamper with removable liners. A simple labeling system (lights/darks/delicates) saves time.
Consider ergonomic details: handles comfortable to grasp, drawer faces that accept fingers from below, and pull-outs that glide smoothly. Test a sample unit in-store if possible—if it sticks now, imagine daily use.
Lighting that flatters without glare
Lighting can make a dressing room feel polished or punishing. Aim for layered light: ambient, task, and accent. Start with high-quality ambient illumination—ceiling fixtures or continuous linear LEDs along the top of cabinets—set to a neutral tone. Many people prefer the calm of warm-to-neutral ranges around 2700–3500 K for dressing, rather than ice-cold light that can wash out textures.
For task lighting at mirrors, mount vertical fixtures on both sides to minimize shadows on the face. At wardrobes, add LED strips inside carcasses with door switches so they turn on as you open. Keep the luminance gentle; a soft diffusion lens reduces bright spots. If you like a dramatic look, add accent lighting below shelves or under toe-kicks to create a floating effect, but avoid placing accent light directly behind your primary mirror as it can halo outlines in photos.
Dimmer controls let you move from early-morning calm to dress-for-event brightness. Where natural light is present, use blinds or sheer curtains to soften midday glare. Always review the color rendering index (CRI); CRI 90+ helps fabrics appear true to life.
Mirrors, seating, and surfaces
Mirrors are not just tools; they are spatial devices. A full-height mirror expands the room visually and offers head-to-toe checks. A tri-fold mirror makes it easier to see profiles while keeping the footprint small. If you add a vanity mirror, place it at seated eye height and angle gently to reduce overhead reflections.
Seating improves comfort and can double as storage. A small bench or ottoman provides a perch for shoes and a surface for laying out outfits. Consider a hinged-top bench with a soft-close stay to avoid finger pinches. Where space is tight, choose a low-profile stool that tucks under a floating shelf.
Surfaces such as shelves, counters, and tops should be easy to clean. Matte finishes hide fingerprints better than high-gloss. A narrow counter near the mirror gives a landing spot for watches, glasses, and hair tools. Add a heat-resistant pad if you use styling appliances; this simple insert protects finishes and keeps the counter clutter-free.
Materials, finishes, and colors
Material choices affect durability and mood. Laminates and melamine are budget-friendly and resistant to stains; higher-end laminates can imitate wood convincingly. Solid wood brings warmth, but choose stable species and finishes that resist yellowing. Painted MDF offers a smooth look for doors and panels; verify density and proper sealing at edges.
Hardware quality plays a huge role in daily satisfaction. Metal runners rated for repeated use, soft-close hinges, and solid handles feel calm and precise. For rods, choose steel or aluminum with secure end brackets. For pull-outs, prefer metal frames over plastic, especially for heavier loads.
Color strategy: many dressing rooms benefit from neutral bases with one or two accent tones. Cream, sand, stone gray, and soft taupe calm visual noise, while a deep green or navy back panel can add depth and highlight your clothing. If you like airy lightness, blend warm whites with lightly grained wood; for a boutique vibe, pair dark carcasses with brass hardware and low-gloss paint. Always test swatches under your actual lighting to avoid surprises.
Airflow, moisture, and clothes care
Textiles appreciate gentle airflow and stable humidity. A dressing room edged with solid doors can trap stale air, so leave a small gap above or below doors, or integrate discreet grilles. In warm climates, a low-noise ceiling fan set to slow speed can help keep air moving without blasting garments. If your space tends to feel stuffy, a compact dehumidifier with auto-drain routing can help reduce moisture and odors.
A few micro-habits support clothes care: let shoes dry on ventilated shelves after outdoor use, leave garment bags unzipped for an hour after returning home, and store heavy coats on robust hangers to avoid shoulder dents. Place cedar or other natural sachets in zones prone to stale smells. Launder soft accessories gently and allow full drying before stowing.
Sunlight is a friend and foe; it brightens but can fade fabrics. If strong sun hits a section, use UV-filtering window film or a sheer layer to soften it. Rotate display positions so any one garment does not sit in the same bright spot for months.
Tech and accessories that genuinely help
Smart touches can smooth daily routines without overcomplicating things. Motion-activated LED strips inside cabinets save fumbling for switches. A small wireless charger near a vanity keeps devices topped up while you get ready. If you enjoy outfit planning, add a simple tagging system: color-coded hangers or clip-in tokens that mark “work,” “weekend,” “event,” and “travel.” It speeds up decisions on busy mornings.
Labeling helps shared spaces. Discreet labels on drawer interiors prevent confusion and encourage tidiness. Slim pull-out racks for belts or scarves add order with minimal footprint. For jewelry, shallow trays with modular inserts adapt as your collection changes. If you keep fragrance on display, place bottles away from direct light and add a tray to prevent ring marks on shelves.
For security and peace of mind, a small lockable compartment protects passports and small valuables. Mind cable management around vanities so cords never hang over edges; a grommet or cord cover makes a big difference.
Budget planning and cost-saving moves
Costs vary widely by system and finish, but a simple framework makes planning clearer:
- Structure (40–60%): Carcasses, rods, shelves, and doors. Save here by mixing modular units with a few custom pieces where fit matters most.
- Hardware and accessories (15–30%): Runners, hinges, pull-outs, organizers. Do not skimp on runners and hinges; they define how the space feels.
- Lighting (10–20%): Ambient and task fixtures, switches, wiring. Reuse existing wiring runs when possible, and choose LED strips with replaceable drivers.
- Decor and soft goods (5–15%): Seating, rugs, trays, mirrors. Affordable upgrades here can transform the vibe.
Practical savings:
- Use standard widths (e.g., 600 mm, 800 mm) to keep doors and shelves economical.
- Choose melamine interiors with wood veneer fronts to blend durability and warmth.
- Add lighting only where it improves function—inside main compartments and at mirrors—rather than everywhere.
- Phase upgrades: start with structure, then add specialized pull-outs if a need persists after a few weeks of use.
Many homeowners also find value in combining new components with a refurbished dresser or vintage chest. Refinished pieces bring character and reduce waste.
Installation, safety, and maintenance
Even modest dressing rooms carry concentrated weight. Anchor tall units to studs or masonry using appropriate fasteners. If your wall is drywall with metal studs, use anchors rated for cabinets and verify pull-out loads. Place heavy drawers low to lower the center of gravity. Keep pathways clear of protrusions; a flush toe-kick prevents stubbed toes.
Maintenance is straightforward with a monthly rhythm:
- Dust fronts and handles, then inside shelves with a microfiber cloth.
- Wipe drawer runners with a dry cloth; if gliding feels rough, check for debris.
- Clean mirrors with a soft cloth and streak-free solution; avoid overspray on wood.
- Inspect LED strips and drivers; replace failing sections before they flicker.
- Rotate garments seasonally so frequently worn items do not live in the hardest-to-reach spots.
Each quarter, review categories: donate items you no longer wear, and rebalance space allocations. A few small tweaks keep the room aligned with your current lifestyle rather than last year’s habits.
Common mistakes and how to fix them
Plenty of dressing rooms look great in photos but frustrate in daily use. These are the most common pitfalls and straightforward remedies:
- Too much open storage: It invites dust and visual clutter. Fix by adding doors to one or two towers, or by using fabric covers for seldom-worn items.
- One-note lighting: A single overhead fixture creates harsh shadows. Add side lighting at mirrors and soft strip lighting inside wardrobes.
- Ignoring ergonomics: Drawers that are too low or too high reduce use. Keep most-used drawers between knee and chest height; put heavy items near hip height.
- Overloading rods: Rods can bow over time. Install center supports or split long spans into two bays.
- Skipping airflow: Stale smells build up fast. Introduce small vents, use breathable bags, and move air gently with a fan on low speed.
- Buying organizers before sorting: Fix by doing the Four Boxes sort first, then selecting fittings that match actual quantities.
When you inherit a layout that feels wrong, change one variable at a time. Swap a shelf for a drawer, move long-hang to the end of a run, test lighting at a mirror. Small adjustments yield outsized improvements.
Style inspiration by home type
Different homes suit different dressing room aesthetics. Consider these tailored ideas and adapt them to your space:
- Compact apartment: Choose light-toned melamine with integrated mirror doors and slim pull-outs for belts and scarves. Use sliding doors to conserve walkway clearance. Temper light with sheer curtains at windows.
- Townhome: Embrace L-shape millwork that mirrors the stair’s geometry. Add brass hardware and a deep green back panel for boutique charm. Use a tri-fold mirror to check outfits without consuming wall width.
- Detached house: Opt for a U-shape with a peninsula vanity. Keep one end open with floating shelves and accent lighting for a gallery-like feel. Include a lockable drawer for valuables.
- Loft: Use open rail systems for an airy look, then nest a freestanding wardrobe to hide formal pieces. Concrete floors benefit from a soft rug for acoustic calm. Integrate track lighting with dimmers to tame the large volume.
For color palettes, try warm whites and oak for calm, moody blues and brass for richness, or monochrome with matte black accents for sleek minimalism. The right palette should complement not just clothing, but the adjacent bedroom materials too.
Planning checklist and measurements guide
Checklists keep projects moving. Use the list below to plan, order, and install with fewer surprises:
- Measure: Room length/width/height, door swing, window dimensions, outlet locations.
- Inventory: Count long and short hanging items, folded stacks, shoes, handbags, and accessories.
- Layout: Choose galley, U, L, peninsula, or room-within-a-room based on circulation.
- Structure: Pick modular, built-in, open rail, or freestanding systems—or a mix.
- Storage fittings: Drawers, shelves, pull-outs, specialty racks, hampers.
- Lighting: Ambient, task at mirrors, LED strips inside cabinets, dimmers.
- Materials: Carcass finish, door style, hardware, rods.
- Seating & mirrors: Bench/ottoman, full-height mirror, vanity mirror.
- Airflow: Gaps, grilles, fan on low speed, compact dehumidifier if needed.
- Budget: Allocate percentages, plan phases, reserve contingency.
- Safety: Anchors to studs, appropriate fasteners, clear walkways.
- Maintenance: Monthly wipe-down, quarterly category review, annual refresh.
Quick measurements reference: double-hang bays at ~1000–1100 mm and ~1500–1700 mm, drawer heights at ~200–250 mm for folded clothes, shoe depths at ~280–300 mm (450 mm for boots), and walkway clearances at ~900 mm where possible. Adjust for your height and reach, and keep most-used items in the ergonomic “golden zone”—between knee and chest height.
Seasonal refresh and long-term care
A dressing room serves you best when it evolves with the calendar. At the start of each season, rotate garments so the current set moves into hot zones. Store off-season pieces in breathable bags or covered bins, labeled by type. Place a small sachet in each bin to keep odors at bay.
Twice a year, reassess lighting color temperature. Warmer light may feel better in winter; slightly cooler neutral light can be energizing in summer mornings. Clean or replace filters in fans or compact dehumidifiers. Reseat any loose handles and tighten hinge screws. Touch up paint on scuffed edges with a small artist’s brush; it is quicker than a full refinish and keeps the space feeling cared for.
When your habits change—new job, different routine—update location assignments. Example: move workwear to the center bay if it becomes your daily uniform, and shift event wear to a higher shelf. A few minutes of reorganization pays back in smoother mornings.
Where to find more inspiration and help
If you want more real-home examples, sizing tips, and material ideas for Indoor Dressing, browse resources on Goan Homes. Many homeowners share solutions that balance everyday use with style, and you can compare layouts similar to your own space to spark new ideas. Bookmark designs that match your room’s constraints—ceiling height, door positions, window placement—and adapt the best details.
For complex installations, consult a qualified carpenter or cabinetry specialist. Bring your measurements, photos, and a list of priorities. Ask for a phased plan that starts with structure and adds accessories later, so you can adjust based on real-world use. This approach keeps budgets under control while ensuring the final space supports your routines.
Pulling it all together
Thoughtful dressing rooms are built on clear goals, strong structure, ergonomic storage, and gentle lighting. Start with the layout that supports circulation, choose systems that match your home and budget, and solve for everyday motions: reaching a sweater, stowing shoes, checking a mirror, and setting a phone on charge. Add airflow so fabrics remain fresh, and keep maintenance simple—a regular wipe-down and seasonal rebalancing are enough for most homes.
As you apply these dressing room ideas, remember that no single solution fits everyone. Hybrid systems, mixed finishes, and layered lighting let you tailor the space over time. When the room is honest about your habits—what you reach for, where you sit, how you move—it becomes more than storage. It becomes a calm, functional part of your day.