Many successful projects begin with careful home decoration planning, not a shopping spree. If you want rooms that look good, work hard, and age gracefully, you need a plan that connects budget, timeline, layout, and materials before the first box arrives. This article shows a practical, room-by-room process with checklists, sample numbers, and decisions in the right order so you can keep momentum and avoid avoidable rework.
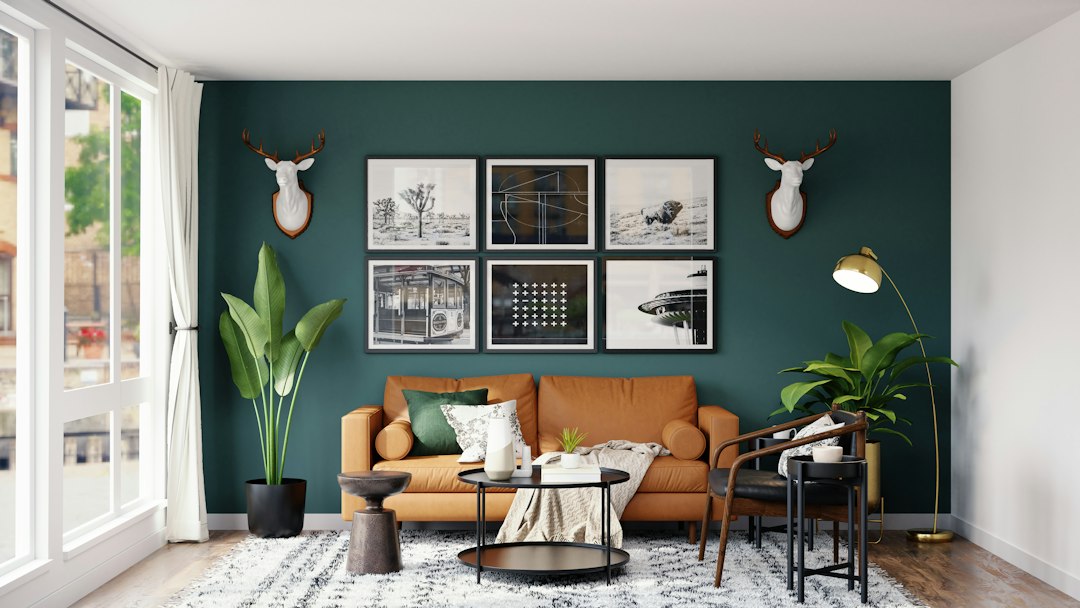
home decoration planning: Step-by-step overview
Decoration is a sequence of choices where each step influences the next. A solid plan asks three questions up front: what do you need, what can the space support, and how much time and money do you want to invest. When those answers line up, the rest gets easier. Use the following overview to organize a project from first idea to final styling.
- Clarify goals by room. Write a sentence for each room (for instance, “Quiet reading nook + flexible seating for four”). Add 3–5 must-haves and 3–5 nice-to-haves.
- Map constraints. Note square footage, door swings, window heights, radiators, fixed plumbing, natural light, HVAC vents, and your daily routines. Take quick photos of each wall for later reference.
- Define scope. Decide whether you are refreshing finishes and furnishings, making limited electrical changes, or doing light carpentry such as built-ins. Scope clarity controls budget and schedule drift.
- Set a realistic budget envelope. Split it into baseline purchases (certain), optional upgrades (conditional), and a contingency reserve (often 10–15 percent) to absorb surprises without stalling.
- Choose a style direction. Three to five mood images per room are enough to keep choices coherent. Add a short palette note to each image (“warm whites + oak + black accent”).
- Measure and sketch. Capture accurate dimensions, then produce a simple scaled plan. Tape key footprints on the floor (sofa, bed, dining table) to spot issues before ordering.
- Create a shopping matrix. A spreadsheet with items, target price, quoted price, shipping, lead time, and status (ordered/delivered/installed) keeps you in control.
- Build a timeline. Work in phases: discovery, concept, detailed planning, ordering, prep/trades, and install/styling. Align long-lead items first, then layer fast-turn items around them.
- Plan logistics. Decide where deliveries will be staged, who will assemble what, and how you will dispose of packaging. Small logistics choices save hours on install day.
Think of this sequence as a loop. Each week, review what arrived, what slipped, and what you can resequence. The more consistent your loop, the less the project drifts.
How to start home decoration planning
Starting well is half the work. Begin with a one-page brief per room and a master summary for the whole home. This simple documentation helps you compare priorities across rooms, decide the order of operations, and communicate clearly with family members, contractors, or vendors.
Build each room brief with:
- Purpose: What daily activities happen here? Who uses the space, and when?
- Pain points: List what frustrates you now (glare, no storage at the entry, hard-to-clean materials).
- Success snapshot: One sentence describing what “done” looks like.
- Constraints: Dimensions, radiators, outlets, ceiling heights, and awkward corners.
- Style note: 3–5 words (e.g., “calm natural textures,” “graphic modern contrast”).
- Budget bands: Value, mid, and higher-tier examples so you can scale decisions.
At the whole-home level, make a short list of guiding rules. Examples: one dominant neutral across common areas, consistent metal finishes by floor, and every room needs three light sources. These rules speed up decisions and reduce second-guessing once you are in the weeds of product pages.
Budget frameworks and realistic cost ranges
A useful budget is a decision tool, not a wish list. Structure it in three parts—baseline, options, and contingency—so you can react calmly when a backorder appears or a delivery cost changes. Think in ranges rather than single numbers, because location, supply chain conditions, and quality tiers vary widely.
- Living room (furnishing only): Value 1,500–3,000; mid-tier 3,500–7,000; higher-tier 8,000+ (sofa, rug, coffee table, media console, lighting, side tables, window dressings, basic art).
- Kitchen (cosmetic refresh): Value 2,000–5,000; mid-tier 6,000–12,000; higher-tier 15,000+ (paint, hardware, faucet, lighting, backsplash, compact appliances if needed). Full kitchen remodels can run far higher depending on layout and appliances.
- Bedroom (furnishing): Value 1,000–2,500; mid-tier 2,500–5,000; higher-tier 6,000+ (bed, mattress, nightstands, dresser, rug, curtains/blinds, task lights).
- Bathroom (refresh): Value 1,500–3,500; mid-tier 4,000–9,000; higher-tier 10,000+ (fixtures, vanity, lighting, mirror, accessories). Moving plumbing or retiling changes costs quickly.
- Entry/hall (storage + lighting): Roughly 400–2,000 depending on built-ins, runners, and fixtures.
Two habits stretch budgets:
- Price-per-use thinking. Spend more where hands and bodies interact daily: the sofa you sit on, the mattress you sleep on, the faucet you turn hundreds of times a week. Spend less on items with occasional use.
- Upgrade the touchpoints. Handles, switches, door hardware, and bath accessories shape how a room feels. Well-chosen touchpoints make spaces feel higher quality without inflating large-line-item costs.
Track costs and commitments in a live spreadsheet with columns for target price, quoted price, shipping/tax, ETA, and vendor contact. Add a status column (ordered, delivered, installed) to see cash flow and logistics at a glance.
Project timeline and sequencing that works in real life
Timelines fall apart when lead times and trades are not aligned, or when decisions are made out of order. Use a six-phase structure and overlap carefully only where risk is low.
- Discovery and measurements (1–2 weeks). Measure rooms, note door swings and window heights, count outlets and vents, and photograph corners. Small measurement errors generate big headaches later.
- Concept and budget alignment (1–2 weeks). Create mood boards, draft baseline lists, set cost envelopes, and run quick availability checks for key items.
- Detailed planning (2–4 weeks). Produce scaled floor plans, elevations for storage, a lighting plan, a color palette, and a shopping list with links.
- Purchasing and lead times (2–8+ weeks). Sofas, rugs, and custom curtains typically run longer. Lighting and hardware can be quicker but vary by supplier.
- Prep and trades (1–3 weeks). Painting, electrical additions, wallpaper, and light carpentry. Confirm tool access, parking, and protective floor coverings before trades arrive.
- Install and styling (1–2 weeks). Schedule furniture deliveries the same week as final paint cures. Hang fixtures and art after big pieces are in place.
Sequence carefully: electrical rough-ins before paint, window treatments after paint, rugs before heavy furniture, and art last. Keep weekends lighter to handle deliveries, returns, and minor corrections. Share the plan with vendors so they can flag backorders early and propose substitutions that match your style and budget bands.
Design direction: styles, palettes, and mood boards
Most projects wobble from too many options, not too few. Reduce noise with clear constraints. One mood board per room keeps choices coherent without killing creativity.
Build each board with:
- One anchoring image that captures mood (bright and airy vs. cozy and grounded).
- Three to five materials that you could actually buy: floor sample, wall paint, fabric, metal finish, tile or stone.
- Two or three hero pieces that could anchor the room (sofa, dining table, bed frame, pendant light).
- Light plan concept showing the mix of ambient, task, and accent lighting.
Palette tips that age well:
- Pick one dominant neutral for common areas to unify the home (for example, a warm off-white that suits both daylight and evening light).
- Choose one accent color family per room and repeat it in small doses (pillows, art mats, a glazed vase).
- Balance sheen and texture: matte walls make metals and glass pop; glossy tile needs softer textiles to keep the room welcoming.
Test samples at different times of day and write supplier, product name, and price on each sample. Build a small materials tray per room so you can check harmony as orders arrive.
Measure, map, and lay out each room
Great design begins with accurate measuring. A few careful hours with a tape measure and a basic floor plan can save weeks of returns and frustration.
Measurement checklist:
- Overall length/width of the room, ceiling height, soffits or beams, and alcoves.
- Door and window widths and heights; note sill heights and swing directions.
- Radiators, vents, thermostats, and outlets; mark clearances you need to preserve.
- Distances from corners to openings so you can place storage and art precisely.
Use scale planning to test footprints. For living rooms, keep a comfortable walkway (ideally 760–900 mm) behind sofas or around coffee tables. In bedrooms, aim for at least 610 mm on each side of the bed. In dining areas, allow 900–1,000 mm between table edge and walls or furniture so chairs can slide back comfortably.
Common layout pitfalls and better defaults:
- Undersized rugs. If in doubt, size up. At minimum, front sofa legs on the rug; under dining tables, chairs should sit fully on the rug even when pulled out.
- Flat lighting. Relying on an overhead alone creates shadows at seats and counters. Layer ambient, task, and accent lighting with dimmers.
- Ignoring vertical storage. Tall bookcases, wall cabinets, and above-door shelving free floor space and help small rooms work harder.
Mark positions with painter’s tape at full scale on the floor and walls. Seeing a sofa footprint, nightstand spacing, or pendant location in real space boosts confidence before you place orders.
Materials and finishes: durable, cleanable, and cohesive
Materials drive how a home looks and how it lives day to day. Favor finishes you like to touch and that suit the reality of your household (kids, pets, cooking frequency, sun exposure).
Guidelines that help most homes:
- Floors: Solid and engineered wood add warmth; durable vinyl plank is practical in kitchens and entries; large-format porcelain tiles reduce grout maintenance in baths.
- Walls: Use washable paint finishes in high-traffic areas. Slightly deeper wall color than trim can add depth without visual clutter.
- Fabrics: For sofas and dining chairs, consider performance textiles with tight weaves; for curtains, lined panels improve light control and add fullness.
- Metals: Mix intentionally: choose one dominant finish and one accent. Repeat each at least twice so the mix looks deliberate rather than random.
- Countertops and vanities: High-quality quartz or porcelain slabs keep maintenance low. If you love natural stone, request a good seal and embrace patina.
Order samples early and label them. Test cleanability with a damp cloth and mild soap on a spare swatch. Note how surfaces look in morning, afternoon, and evening light so your selections hold up throughout the day.
Living room plan: seating, light, storage, and flow
The living room often sets the tone for the entire home. Prioritize seating comfort, layered lighting, and hidden storage so the space shifts easily from quiet evenings to casual hosting.
Checklist:
- Seating: Choose the primary sofa first. Confirm seat height (430–460 mm), depth, and back angle that suit your body. Add chairs or a sectional if the room depth allows.
- Rug: Size to the seating group; 200 × 300 cm or 240 × 340 cm suits many apartments. Larger rooms can take 270 × 370 cm or 300 × 400 cm.
- Tables: Aim for coffee table length at roughly two-thirds of the sofa, with 350–450 mm between table and seat fronts.
- Media: If a TV is present, center it at eye height from the main seat. Manage cables with cord covers or a media unit with integrated routing.
- Lighting: Combine a dimmable overhead with a reading lamp and either wall lights or accent lamps for layered mood control.
- Storage: Closed media units, storage ottomans, or built-in shelving keep visual noise low. Baskets corral remotes and chargers.
Style with restraint. Fewer, larger decor pieces look calmer than many small items. Repeat a color or material three times (for instance, black metal lamp, black photo frame, black cabinet pull) for instant cohesion.
Kitchen plan: function first, polish second
Even a cosmetic refresh benefits from a functional review. Focus on work zones, lighting that supports tasks, and surfaces that clean easily.
Function checklist:
- Work triangle and zones: Keep efficient paths between sink, cooktop, and fridge. Place prep space immediately beside the sink where possible.
- Countertops: Pick a surface you can maintain comfortably. If you bake often, consider a cool, smooth section for rolling dough.
- Backsplash: Tile to the underside of cabinets or a tidy termination line. Use wipeable grout and choose a tile size you can keep clean.
- Lighting: Under-cabinet task lights matter more than a single bright ceiling fixture. Add dimmers so cooking and dining feel distinct.
- Storage: Drawer organizers for utensils and spices; pull-out trays for pots; vertical dividers for baking sheets; hooks or rails for daily mugs.
- Water and air: A pull-down sprayer faucet is versatile. Confirm the vent hood actually vents or at least filters effectively.
Cosmetic upgrades with strong impact include modern hardware, a new faucet, counter stools, a runner rug, and a statement pendant. If appliances are in scope, verify electrical loads, clearances, and door swings before ordering.
Bedroom plan: calm, dark, and breathable
Bedrooms work best when simple. Prioritize a supportive mattress, blackout capability, and quiet storage that minimizes visual noise.
Checklist:
- Bed and mattress: Size the bed to the room and leave comfortable circulation space around it. If you share, check motion isolation and preferred firmness.
- Window control: Combine blackout shades with curtains to control light leaks. Seal edges with side channels if needed.
- Nightstands and lamps: Match heights to the mattress top so switches are reachable without stretching. Consider dim-to-warm bulbs for evening light.
- Closet: Use double-hanging where possible. Add drawers for folded basics and a valet hook for next-day outfits.
- Rug or runners: A soft landing beside the bed improves comfort first thing in the morning.
Keep color palettes softer than social spaces. Natural textiles and fewer high-contrast patterns reduce visual stimulation. A bench at the foot of the bed, a hamper with a lid, and a small tray for jewelry keep routines tidy and calm.
Bathroom plan: bright, dry, and organized
Moisture management and easy cleaning drive bathroom choices. Direct light to the mirror, keep surfaces off the floor where possible, and plan storage for daily items so counters stay clear.
Checklist:
- Lighting: Pair a center ceiling light with face-level sconces on a dimmer to avoid harsh shadows at the mirror.
- Ventilation: Confirm the fan is sized for the room and run it beyond shower time to clear humidity.
- Storage: Shallow medicine cabinets for small items; drawers for hair tools; a niche or caddy in the shower for bottles.
- Surfaces: Large-format tile on floors and walls lowers grout upkeep. Quartz or porcelain tops resist stains.
- Water kit: A hand shower on a slide bar adds flexibility. Check reach to avoid overspray.
For comfort and safety, add a non-slip mat, consider soft-close toilet seats, and place towel bars and hooks within easy reach. Small upgrades like a framed mirror, coordinated towels, and a simple shower curtain can refresh a space without major work.
Procurement, vendors, and risk management
Good suppliers and clear paperwork reduce friction. Before you pay, ask about lead times, return windows, restocking fees, delivery methods (curbside vs. white glove), and assembly options. Save quotes and order confirmations in a shared folder labeled by room and vendor.
Procurement controls:
- One source of truth: Keep a single spreadsheet and link PDFs to each item row. Mark statuses and capture delivery tracking numbers.
- Delivery staging: If possible, store boxes in one room or a short-term storage unit until installation. Open boxes upon arrival to check for damage and completeness.
- Scheduling: Book trades only after you have delivery confirmation for critical items such as vanities, lighting, or hardware.
- Returns plan: Keep packaging until you have tested items in place. Photograph labels in case you need to re-order.
Common risks and ways to lower exposure:
- Backorders: Identify second-choice alternates early for key items like rugs, sofas, and pendants.
- Color mismatch: Order extra samples, confirm dye lots for rugs and fabric, and buy enough tile to cover waste and future repairs.
- Scale errors: Tape out footprints on floors and use cardboard templates for lights and mirrors to verify visual weight.
- Scope creep: Revisit room briefs weekly. If a new idea appears, trade it against a lower-priority item rather than expanding scope.
When you want model room orders, supplier shortlists, and sourceable examples, browse checklists and layouts on Goan Homes for ideas aligned with the planning approach in this guide.
Styling and finishing touches that last
Styling turns a well-planned room into your room. Group items in odd-numbered clusters, vary heights, and leave negative space so arrangements breathe. Plants add movement and soften hard edges; pick species that work with your light levels and watering habits.
Tips that keep rooms feeling fresh over time:
- Use larger art rather than many small frames. It simplifies walls and makes dusting easier.
- Switch pillow covers seasonally while keeping core inserts. It is an easy refresh with minimal storage space.
- Rotate books and objects on open shelves twice a year to prevent visual clutter.
- Use trays on coffee tables and nightstands to contain small items neatly.
Photograph each finished room once you are happy. Pictures are a useful reference when you clean, replace items, or plan future updates, because they reveal what made the composition feel balanced.
Maintenance planning: care routines that protect your investment
Care is part of design. A short monthly routine helps finishes, fabrics, and fixtures age well, and a quarterly check keeps small issues from growing. Write tasks into your calendar and keep basic supplies together in a single caddy.
Monthly routine ideas:
- Vacuum rugs and upholstery with appropriate attachments; rotate rugs to balance wear and sunlight.
- Wipe switches, handles, and pulls; clean faucet aerators to keep flow consistent.
- Check caulk lines in baths and kitchens and touch up early if gaps appear.
- Dust light fixtures and door tops; lamp shades gather dust quickly.
Quarterly routine ideas:
- Wash or dry clean curtains and cushion covers following care labels.
- Inspect grout and stone sealants; re-seal as product guidance suggests to keep surfaces resilient.
- Re-level furniture feet and tighten hardware; seasonal movement can loosen screws.
- Purge one drawer or shelf per room; maintenance is easier when storage is not overfull.
Note recurring issues. If high-traffic areas scuff quickly, consider a more durable paint finish or a runner. Small adjustments keep your home feeling considered without major spending.
Common pitfalls and ways to sidestep them
Every project has speed bumps. The following pitfalls appear frequently and have straightforward workarounds when you plan for them.
- Buying before measuring. It is tempting to fall in love with a sofa online. Tape the footprint first. Check doorways, elevators, stairwells, and turns in the path of travel.
- Ignoring lead times. A single long-lead item can stall the install phase. Identify critical-path pieces early and order them first.
- Too many finishes. Variety is good; chaos is not. Limit metal finishes per room to one dominant and one accent; repeat each at least twice.
- No plan for cords. Plan power access for lamps and media and choose media units with built-in cable management.
- Rug and art scale issues. Most rugs chosen without tape-out are too small; most art chosen without a mockup is too small. Tape out sizes on the wall and floor to verify.
- Underestimating styling time. Reserve a full day for placing objects, adjusting heights, and stepping back to edit. The last 10 percent creates the overall impression.
When in doubt, pause and return to the brief. Does a tempting purchase support your goals, fit constraints, and match the palette? If not, let it pass and keep the plan intact.
Bringing it all together
Homes feel coherent when you connect the dots: a simple color story repeated across rooms, lighting that supports both tasks and relaxation, and furniture that respects movement and human scale. Start with room briefs, measure carefully, plan budgets in ranges, and sequence timelines with lead times in mind. Keep lists short enough to manage and long enough to avoid surprises.
Give the plan some breathing room. A small reserve of time, money, and energy makes decisions easier and outcomes more satisfying. With the checklists and frameworks above, you can approach each room with clarity and complete your project with steady progress rather than stress.